Rails ユーザー認証

前提条件
Railsでプロジェクトが作成できていること
こちらについてはRailsプロジェクト作成からMVCまでで記載しています。
Gemfileにユーザー認証用のgem追加
Gemfileの最後に以下を追加する
deviseとはrailsで作ったwebアプリケーションに簡単に認証機能を実装できるgemのことですlogin,logout機能のこと
# ユーザー認証システムを簡単に実装するためのGemです。
gem 'devise'
# ファイルアップロードを簡単に実装するためのGem,Githubのリポジトリからインストールされる。
gem "refile", require: "refile/rails", github: 'manfe/refile'
# ファイルを自動的にリサイズするために使用されるRefileのアドオンGem
gem "refile-mini_magick"
# CSSフレームワークであるBulmaをRailsアプリケーションに統合するためのGem
gem "bulma-rails"
bundle install
$ bundle install下記のように表示されればインストールできています
[DEVISE] Please review the [changelog] and [upgrade guide] for more info on Hotwire / Turbo integration.

  [changelog] https://github.com/heartcombo/devise/blob/main/CHANGELOG.md
  [upgrade guide] https://github.com/heartcombo/devise/wiki/How-To:-Upgrade-to-Devise-4.9.0-%5BHotwire-Turbo-integration%5D
ログイン機能を追加していく
こちらの【GitHub】deviseについてを参考にして作成していくのでこちらも参考にしてみて下さい
インストール
$ rails generate devise:installインストールが完了すると下記のように4つほどセットアップして下さいというメッセージが返ってくるかと思いますので、
メッセージに沿ってセットアップを行なっていきます
===============================================================================

Depending on your application's configuration some manual setup may be required:

  1. Ensure you have defined default url options in your environments files. Here
     is an example of default_url_options appropriate for a development environment
     in config/environments/development.rb:

       config.action_mailer.default_url_options = { host: 'localhost', port: 3000 }

     In production, :host should be set to the actual host of your application.

     * Required for all applications. *

  2. Ensure you have defined root_url to *something* in your config/routes.rb.
     For example:

       root to: "home#index"

     * Not required for API-only Applications *

  3. Ensure you have flash messages in app/views/layouts/application.html.erb.
     For example:

       <p class="notice"><%= notice %></p>
       <p class="alert"><%= alert %></p>

     * Not required for API-only Applications *

  4. You can copy Devise views (for customization) to your app by running:

       rails g devise:views

     * Not required *

===============================================================================
セットアップ①
メッセージに記載されている下記の部分をコピーしconfig/environments/development.rbに貼り付けていきます
config.action_mailer.default_url_options = { host: 'localhost', port: 3000 }貼り付けるとこのような感じになるかと思います(貼り付けた部分だけ載せています)
config/environments/development.rb  # Uncomment if you wish to allow Action Cable access from any origin.
  # config.action_cable.disable_request_forgery_protection = true
  config.action_mailer.default_url_options = { host: 'localhost', port: 3000 }
end
セットアップ②
メッセージに記載されている下記の部分をコピーしconfig/routes.rbに貼り付けていきます
root to: "home#index"貼り付けるとこのような感じになるかと思います(コメントアウトは削除して問題ないです)
config/routes.rbRails.application.routes.draw do
  # Define your application routes per the DSL in https://guides.rubyonrails.org/routing.html

  # Defines the root path route ("/")
  # root "articles#index"
  root to: "home#index"
end
セットアップ③
フラッシュメッセージ(ログイン/ログアウト時にでるメッセージのこと)
メッセージに記載されている下記の部分をコピーしapp/views/layouts/application.html.erbに貼り付けていきます
<p class="notice"><%= notice %></p>
<p class="alert"><%= alert %></p>
貼り付けるとこのような感じになるかと思います(コメントアウトは削除して問題ないです)
app/views/layouts/application.html.erb<!DOCTYPE html>
<html>
  <head>
    <title>RailsRecipe</title>
    <meta name="viewport" content="width=device-width,initial-scale=1">
    <%= csrf_meta_tags %>
    <%= csp_meta_tag %>

    <%= stylesheet_link_tag "application", "data-turbo-track": "reload" %>
    <%= javascript_importmap_tags %>
  </head>

  <body>
    <p class="notice"><%= notice %></p>
    <p class="alert"><%= alert %></p>
    <%= yield %>
  </body>
</html>
セットアップ④
メッセージに記載されている下記の部分をコピーしターミナルで実行していきます
これを行うとログイン画面をカスタマイズすることができるようになる
$ rails g devise:views実行するとapp/views/deviseディレクトリができているかと思います
ログイン画面はapp/views/devise/sessions/new.html.erbになります
新規登録画面はapp/views/devise/registrations/new.html.erbになります
ユーザーモデルを作成
// MODEL部分はモデル名を入力
$ rails generate devise MODEL
認証機能なのでユーザモデルを作成していきます
$ rails generate devise user実行するとdb/migrate/20230405145005_devise_create_users.rbのようなユーザテーブルを作成するためのマイグレーションファイルが作成されるかと思います。
ユーザーテーブルの定義追加
デフォルトだとemailとpasswordしかないので下記を追加していきます
db/migrate/20230405145005_devise_create_users.rb      t.string :username
      t.text :profile
      t.string :profile_image_id
マイグレート実行
ターミナルで下記コマンドを実行します
$ rails db:migrate実行するとdb/schema.rbに作成されたテーブルの情報ができます。
こちらに先ほど追加したusername profile profile_image_idが記載されていれば問題ないです。
db/schema.rbActiveRecord::Schema[7.0].define(version: 2023_04_05_145005) do
  create_table "users", force: :cascade do |t|
    t.string "email", default: "", null: false
    t.string "encrypted_password", default: "", null: false
    t.string "reset_password_token"
    t.datetime "reset_password_sent_at"
    t.datetime "remember_created_at"
    t.string "username"
    t.text "profile"
    t.string "profile_image_id"
    t.datetime "created_at", null: false
    t.datetime "updated_at", null: false
    t.index ["email"], name: "index_users_on_email", unique: true
    t.index ["reset_password_token"], name: "index_users_on_reset_password_token", unique: true
  end
アカウント登録画面の確認
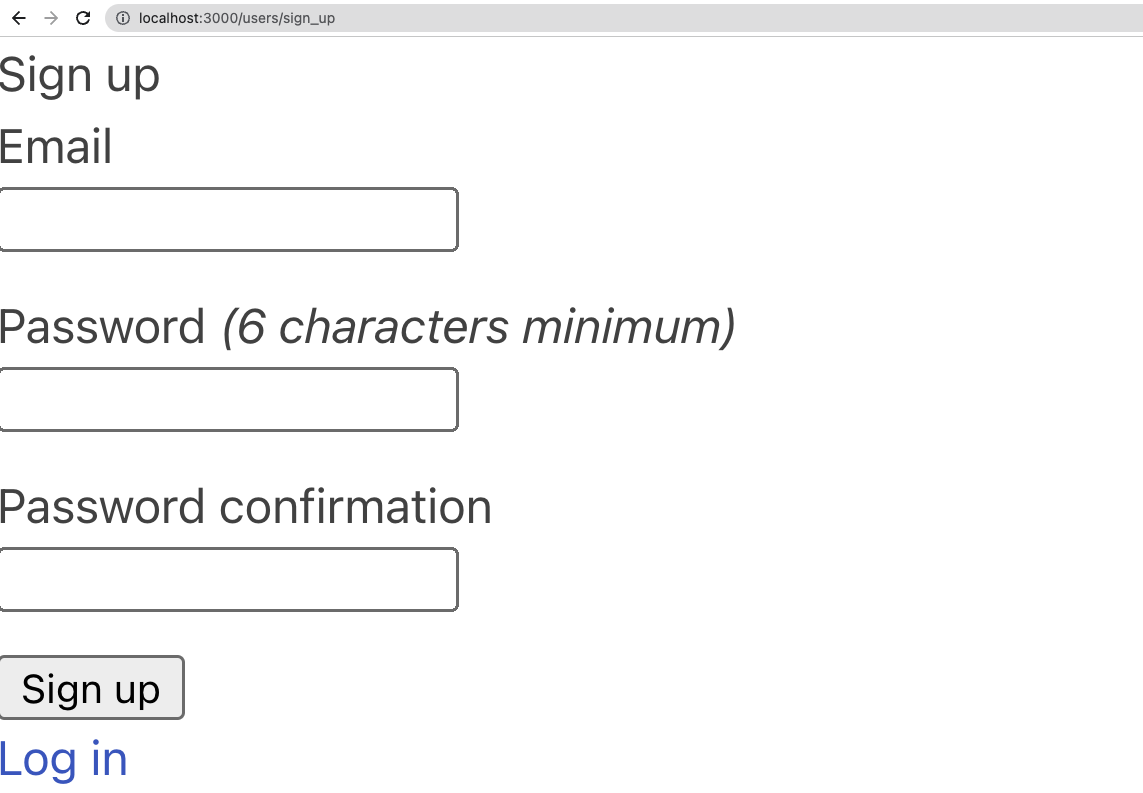
http://localhost:3000/users/sign_upを開くと下記のようにでるかと思います(わかりやすいよう拡大しています)
画像のようにデフォルトで「Eメール」と「パスワード」「パスワード確認」がある状態かと思います。
画面確認ができたので今回はここまでですが、認証画面のスタイルの変更等行うことで自分好みの認証画面にできるかと思うので
試してみて下さい


